
Ever run a brush through your hair, glance at the clock, and think, “I’ve got five minutes… what now?” Same. When I’m racing out the door, I want quick, pretty braids for long hair that look pulled-together without the whole production. If you’re wondering which easy braids actually work on busy mornings, here’s the thing: you only need a couple elastics, a little grip, and a game plan. I’ll share the 10 five-minute braids I reach for the most, plus simple tricks I’ve tested on clean, slippery hair and day-three waves. Don’t sweat it—you can absolutely do these.
What You’ll Need (and What You Can Skip)
You don’t need a full stylist kit. A handful of basics makes quick hairstyling super easy.
- Clear elastics (2–6). Keep a mini pack in your makeup bag.
- Dry shampoo or texture spray for grip.
- Light hair oil or cream for ends and flyaways.
- Bobby pins or a small claw clip (helpful, not mandatory).
- Comb or brush (wide-tooth if you’ve got lots of hair).
Pro tip: If your hair is squeaky-clean, mist mid-lengths to ends with dry shampoo for 5–8 seconds. A little grit = better braids. If it’s day two or three, you’re already there.
How to Make Any Braid Look Fuller (Fast)
I’ve found that the “wow” factor comes from pancaking—that’s hair-speak for gently pulling the outer edges of a finished braid to widen it.
- Tie first, then pull. Secure the braid, then tug outward a few millimeters at a time.
- Work from the bottom up so you don’t loosen the top too much.
- Stop when it’s even. You want airy, not messy.
Key takeaway: Pancaking = instant volume with no teasing.
The 10 Five-Minute Braids (Friendly, Fail-Safe, and Cute)
Below are the styles I rotate through on school runs, office days, travel days, and “I want to look cute without thinking” days. Each one needs about five minutes—set a timer if you like. I do.
1) Low Bubble Braid (No Braiding Required)
This is the “I overslept but I care” ponytail glow-up.
Steps (about 3 minutes):
- Brush hair into a low pony; secure with an elastic.
- Every 2–3 inches, add another elastic down the length.
- Gently pancake each bubble by tugging the sides.
Make it yours:
- Wrap a thin strand around the top elastic and pin underneath to hide it.
- Add a ribbon or hair cuff at the end.
Why I love it: Zero skill, maximum payoff. It stays put under hats and looks intentional from the front.
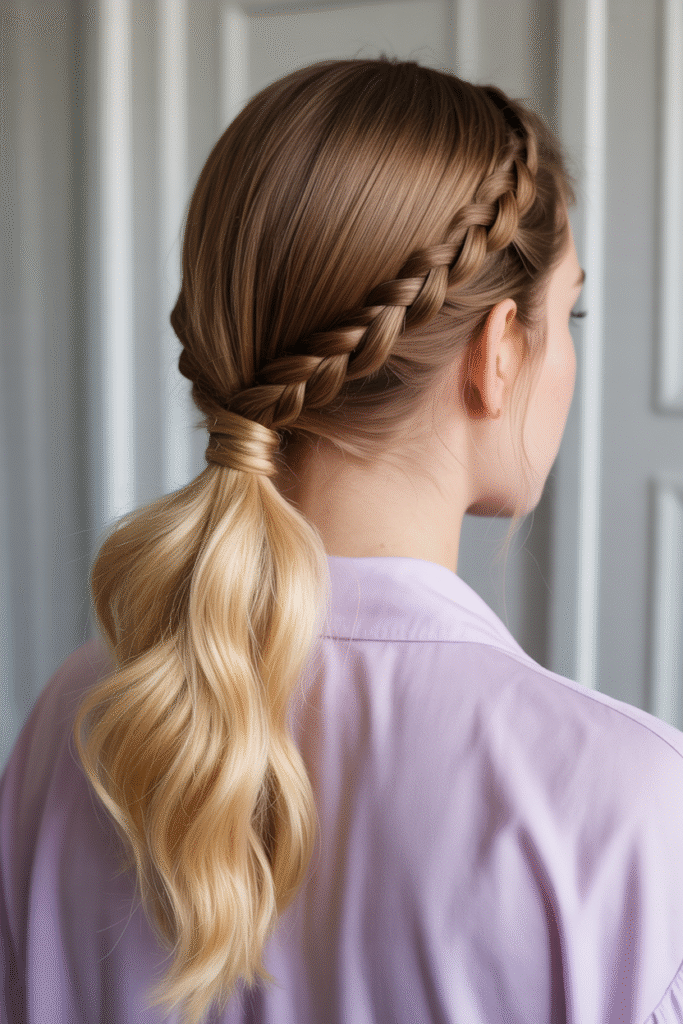
2) Half-Up Rope Twist (Glossy and Grown-Up)
When I want sleek without stiffness, this is my go-to.
Steps (about 4 minutes):
- Take two sections above your ears.
- Twist both sections in the same direction, then wrap them around each other in the opposite direction (this counter-twist locks it).
- Secure where they meet with a tiny elastic or a slim barrette.
Make it yours:
- Leave soft face-framing pieces; smooth with a pea-size drop of oil.
- Finish with a light mist of shine spray.
Key takeaway: Rope twists hold better than they look. Great on slippery hair.
3) Side Fishtail (Looks Fancy, Feels Easy)
Fishtails are surprisingly beginner-friendly once you get the rhythm.
Steps (about 5 minutes):
- Sweep hair over one shoulder; split into two sections.
- Take a small piece from the outer left, cross it to the inner right.
- Repeat from the right to the left. Keep going until you reach the end; tie off.
- Pancake for texture.
Make it yours:
- Start below the ear to save time.
- Add a couple of hair cuffs for a modern detail.
What I’ve found: Two sections are calmer than three when you’re in a rush.
4) Dutch Crown Hack (Halo Vibe Without the Work)
You get the dreamy crown look using short Dutch “tabs” near your hairline—no full wrap-around needed.
Steps (about 4–5 minutes):
- Part down the middle. On the right side, take a triangle by your temple.
- Dutch braid (cross under) for 3–4 stitches, adding hair only from the hairline.
- Pin the small braid across the back. Repeat on the left and overlap the ends.
Make it yours:
- Use gold bobby pins and don’t hide them—they read like jewelry.
- Gently loosen for softness.
Key takeaway: Mini Dutch strands = instant halo with minimal time.
5) Pull-Through Braid (Ponytail With Major Volume)
No braiding—just ponytail segments. It looks like mermaid hair with training wheels.
Steps (about 5 minutes):
- Make a mid or high pony.
- Split the pony into a top and bottom half. Clip the top up.
- Secure the bottom with an elastic 2 inches down.
- Unclip the top, split it in two, bring those pieces around the bottom, and secure another elastic underneath.
- Repeat 2–3 times; pancake each section.
Make it yours:
- Hide elastics by wrapping tiny hair strands around them.
- Finish with a pea-size drop of cream on ends.
Why I reach for it: Big, bouncy volume without tugging the scalp.
6) Accent Braid Trio (Tiny, Trendy, and Fast)
Three small braids add instant texture—even if the rest of your hair is just… hair.
Steps (about 3–4 minutes):
- Take three skinny sections: one near your part, one by your temple, one underneath for dimension.
- Do basic three-strand braids; tie with tiny elastics.
- Leave the rest down, or pop into a low pony.
Make it yours:
- Thread in narrow ribbon or embroidery floss for a color pop.
- Add a bead to the ends if you like a boho touch.
Key takeaway: Micro braids = micro effort, macro style.
7) Front Twisties into a Mini Braid (Face-Framing and Secure)
I use this on windy days; it keeps hair off my face but still soft.
Steps (about 4 minutes):
- Take two small sections at the hairline near your temples.
- Twist each section back, picking up a little hair as you go.
- Meet them at the back and join into a small three-strand braid for 2–3 inches; secure.
Make it yours:
- Swap the mini braid tail for a rope twist tail if that’s quicker for you.
- Curl the two front strands first for a romantic vibe.
What I like: It feels polished but not fussy.
8) Loose French Braid Into Low Pony (Editorial but Easy)

This is your “soft and chic in minutes” situation.
Steps (about 5 minutes):
- Start a French braid at the crown, adding hair loosely for 4–5 stitches.
- Stop at mid-back, gather everything, and secure into a low pony.
- Pancake the French section for lift and wrap a strand around the elastic.
Make it yours:
- Smooth the top with a tiny bit of cream for a cleaner line.
- Or leave it airy for weekend plans.
Key takeaway: Half-braid = structure without the full-time commitment.
9) Double Dutch “Headband” (Sporty-Cute and Sweat-Friendly)
This is the anchor braid I use for workouts and travel.
Steps (about 5 minutes):
- Make a deep side part. Dutch braid along the hairline toward your ear for 3–4 inches.
- Secure and tuck the tail underneath with bobby pins.
- Repeat on the other side for symmetry, or keep it one-sided for an edge.
Make it yours:
- Pair with a low bun or mid pony for all-day control.
- A touch of edge control or pomade keeps the braid line crisp.
Why it works: You get a built-in headband that actually stays.
10) Infinity Braid Wrap at the Pony Base (Looks Advanced, Isn’t)
We’re not braiding the whole length—just giving the base a five-minute figure-eight wrap for a designer finish.
Steps (about 4 minutes):
- Put hair in a low or mid pony.
- Take a thin strand from underneath as your wrapping piece.
- Weave it in a figure-eight pattern around the left side of the pony, then the right, repeating 5–6 wraps.
- Pin the end under the pony to hide it.
Make it yours:
- Combine with the pull-through from #5 if you want extra texture.
- Add a slim silk scarf through the elastic for softness.
Key takeaway: Tiny detail, big upgrade—great for photos and events.
Quick Troubleshooting (So You Don’t Start Over)
Frizz or fuzzies? Smooth with a pea-size drop of oil or hand lotion in a pinch.
Slippery strands? Start with dry shampoo; braid slightly tighter, then pancake.
Bumps at the crown? Hold the base firmly and lift sections with the tail of a comb to smooth.
Ends popping out? Twist ends before tying off, or tuck with a pin.
Remember: Perfect isn’t the goal—polished is. Texture looks intentional.
How to Pick the Right Braid in 10 Seconds
When I’m indecisive, I run this quick filter:
- Need it to stay put? Go Double Dutch Headband (9) or Pull-Through (5).
- Want soft and romantic? Try Half-Up Rope Twist (2) or Front Twisties (7).
- Crave laid-back texture? Accent Trio (6) or Side Fishtail (3).
- Want volume fast? Pull-Through (5) or Bubble Braid (1).
- Want a photo-friendly finish? Infinity Wrap (10) or Dutch Crown Hack (4).
Key takeaway: Match the vibe (sporty, soft, polished, playful) to your day.
Mini Tips by Hair Type
Fine hair:
- Use dry shampoo or texturizing powder at the crown.
- Favor Pull-Through (5), Bubble (1), or Accent Trio (6) for fullness.
Thick hair:
- Work with larger sections to save time.
- Side Fishtail (3) or Loose French-to-Pony (8) control volume nicely.
Curly/coily hair:
- Braid on stretched or detangled hair for speed.
- A touch of leave-in cream keeps definition.
- Double Dutch Headband (9) is amazing for active days.
One-Minute Finishes That Make You Look “Done”
- Face-framing: Curl two tiny front pieces toward your face.
- Shine swipe: Rub one drop of oil between palms; skim over the braid only.
- Elastic refresh: Swap stretched elastics before a big day.
- Photo trick: Pancake more at the bottom than the top for a tapered, flattering braid.
5-Minute Braid Planner & Timer (Checklist + Countdown)
Use this single, simple tool to pick a braid, check your supplies, and run a 5-minute timer while you style. It’s fully self-contained—just click and go.
5-Minute Braid Planner & Timer
Why this helps: Pick a braid, check your essentials, hit start, and style with no overthinking. That’s the whole goal here—simple and doable.
Fast “Which Braid When?” Guide
Fastest five: Bubble (1), Rope Twist (2), Accent Trio (6), Pull-Through (5), Side Fishtail (3).
Workouts or travel: Double Dutch Headband (9), Pull-Through (5).
Date-night pretty: Rope Twist (2), Front Twisties (7), Dutch Crown Hack (4).
Zoom or office: Loose French → Pony (8), Rope Twist (2), Infinity Wrap (10).
Key takeaway: Choose by vibe—sporty, soft, polished, or playful—and you’ll never stare at the mirror stuck.
FAQs (Quick, Friendly Answers)
How do I stop braids from slipping on freshly washed hair?
You don’t need heavy product—just dry shampoo or texture spray from mid-lengths to ends. Start the braid a touch tighter, then pancake to the width you like.
What’s the easiest braid if I’m brand-new?
Start with the Low Bubble Braid—no weaving. The Pull-Through Braid is next; it fakes a true braid with stacked pony segments.
Can I braid damp hair to save time?
Yes, but keep hair slightly damp, not wet. Damp hair stretches more, so be gentle. If you want heatless waves later, braid looser and avoid tight elastics at the ends.
How can I make my braid look fuller without teasing?
Pancake the edges and choose styles that build volume by design: Pull-Through and Bubble braids both deliver maximum fullness with minimal effort.
My ends stick out of the braid. What should I do?
Twist the last 2 inches before tying off, or tuck and pin under the braid. A drop of cream smooths flyaways without making ends stiff.
Wrap-Up: Small Moves, Big Impact
If you’ve got five minutes and a couple of elastics, you’ve got options. **Bubble, Fishtail, Pull-Through, Rope Twist, Dutch Crown—**they’re all simple once you’ve tried them once or twice. What I love about this is how a tiny detail changes your whole look, whether you’re heading to workouts, meetings, or a casual dinner.
Try one or two ideas to start, then rotate a new braid tomorrow. Keep it simple, keep it fun, and remember: it’s amazing what a few small tweaks can do for everyday hair. You’ve got this—and you can totally try one today.