
You want party-proof hair that survives selfies, hugs, and whoever insists on turning the living room into a dance floor? Same. I build my holiday looks around braids because they look festive, last all night, and save me from fussing in the bathroom while everyone demolishes the dessert table. I tested, tweaked, and photographed these looks through years of office parties and chaotic family dinners, so I speak from real-world hair stress. Ready to lock in a style that handles sparkle, snow, and second helpings?
Why Braids Rule for Holiday Season
I chase styles that deliver hold, texture, and glam with minimal touch-ups. Braids hit all three. They hide frizz, frame the face like jewelry, and welcome accessories without drama. You want a style that still looks intentional when the weather flip-flops or Auntie insists on group photos under the world’s brightest overhead light. Braids say, “I planned this,” even when you raced out the door with one mitten.
Quick wins you get from braids:
- Longevity: Braids grip hair oils and stay put through hours of celebrating.
- Versatility: You can dress them up with ribbons, pins, and pearls fast.
- Damage control: You avoid hot-tool marathons and keep ends safe.
- Photo magic: The pattern creates depth and shine, which cameras love.
Prep Like a Pro (In Five Minutes)
I prep hair the same way whether I braid for brunch or for a midnight toast. You don’t need a cabinet full of products; you just need smart layers.
What I use and why:
- Light mousse or volumizing foam: I build grip from roots to mid-lengths.
- Workable hairspray: I set the base, then I finish with a stronger mist.
- Small elastic pack + bobby pins: I stash extras in a coin purse. Ever lost one mid-party? Yeah, me too.
- Shine oil: I smooth the ends after braiding so the finish looks polished.
- Accessories: I keep ribbon, pearl pins, or a velvet scrunchie ready to swap the vibe.
Pro tip: I start with day-old hair or I fake it with dry shampoo. Clean hair slides around like Teflon. Why fight physics when you can game it?
1) The Ribbon-Laced Dutch Braid
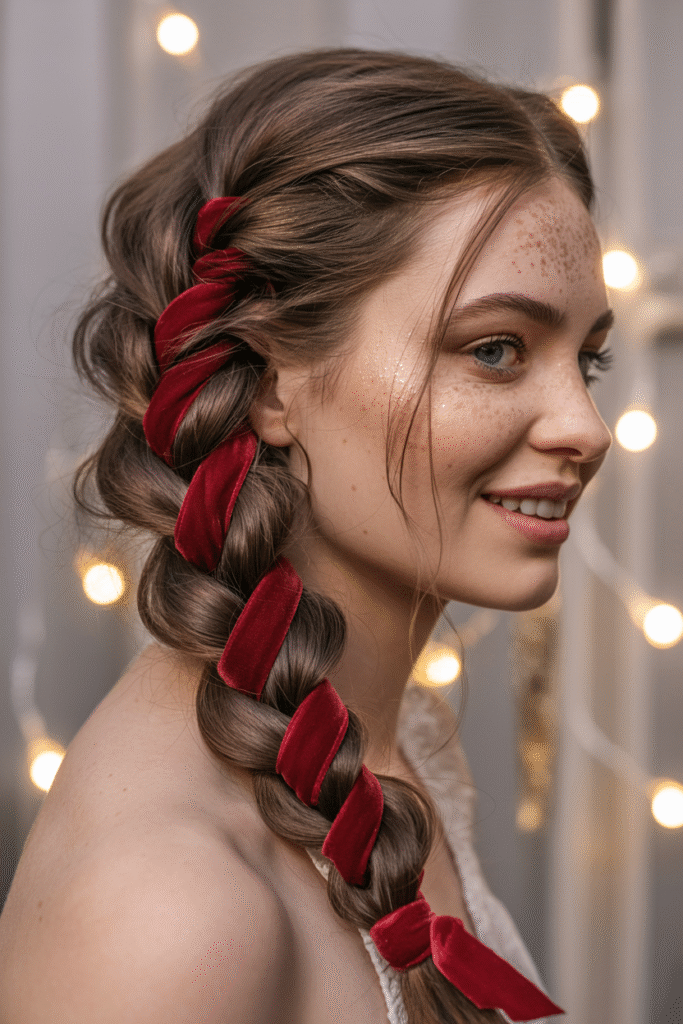
You want statement hair in under ten minutes? I reach for a Dutch braid and weave a ribbon through it. The inside-out plait creates bold ridges that hold accessories like a charm bracelet.
Why it slays
- Bold texture frames your face and pops in photos.
- Ribbon lacing adds instant holiday energy without glitter fallout.
- Scalp-to-nape control keeps layers tamed when you chase kids or canapés.
How I do it
- I split hair into three and cross sections under the middle (not over).
- I add hair at each pass and continue to the nape.
- I tie off, then I thread ribbon through the outer bumps and pancake the braid (gently tug for fuller width).
Style it: I pick red velvet for classic parties and metallic gold for a dress-code mystery.
2) Polished Rope Braid Pony
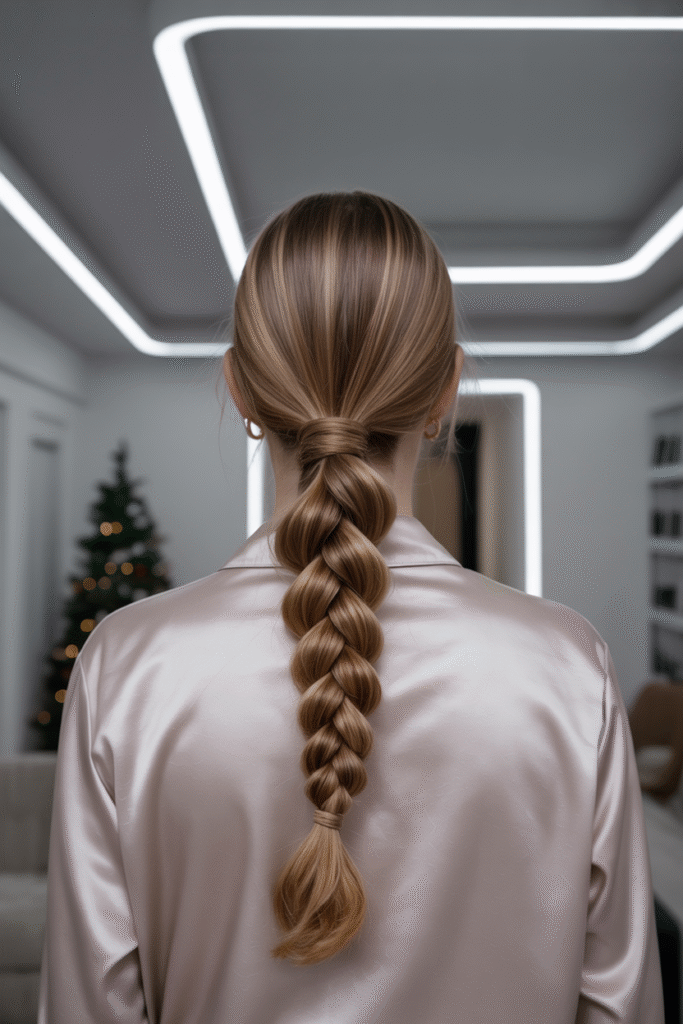
I call this one my “meeting the in-laws but still fun” style. A rope braid pony looks sleek and intentional, and it handles coats and scarves without unraveling.
Why it slays
- Fast build: Two strands, one twist—done.
- Shine payoff: Rope braids reflect light like a mirror.
- Zero bulk at the nape: You avoid that bumps-under-the-scarf issue.
How I do it
- I smooth hair into a high or mid pony.
- I split the pony in two, twist both clockwise, then wrap them counter-clockwise for that rope effect.
- I spray lightly, then I secure with an elastic and wrap a small hair piece around the base for a clean finish.
Style it: I add a bow scrunchie for a cute twist that still reads adult.
3) Soft Crown Braid (Milkmaid Vibes)
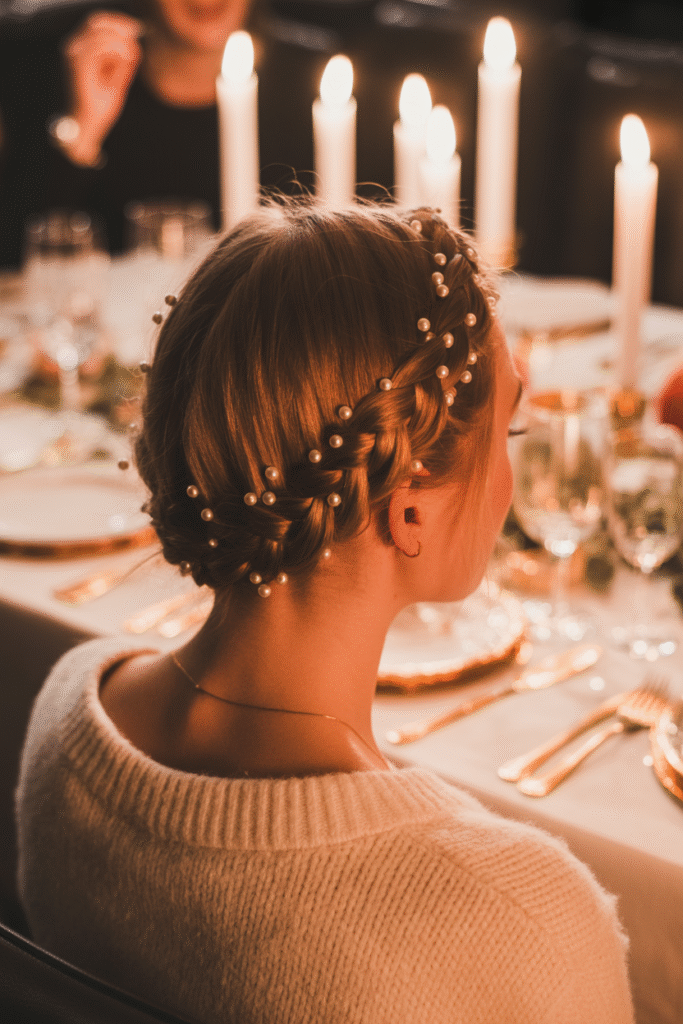
When I want instant romance, I lift a crown braid around the head and pin it low behind the ear. People ask if I spent hours; I nod and accept the compliment even though I finished in eight minutes.
Why it slays
- Face-framing tendrils soften features and play nicely with bold earrings.
- Even weight distribution keeps the style comfy all night.
- Dress-up range: I pair it with a sweater dress or a silk slip. It never argues.
How I do it
- I create two low three-strand braids, then I cross them over my head.
- I tuck the tails under the opposite braid and pin along the edges.
- I pancake the outer edges to thicken the halo and pull a few wisps.
Style it: I dot in tiny pearl pins along the top curve for a snow-kissed look.
4) Half-Up Fishtail with Sparkle Pins
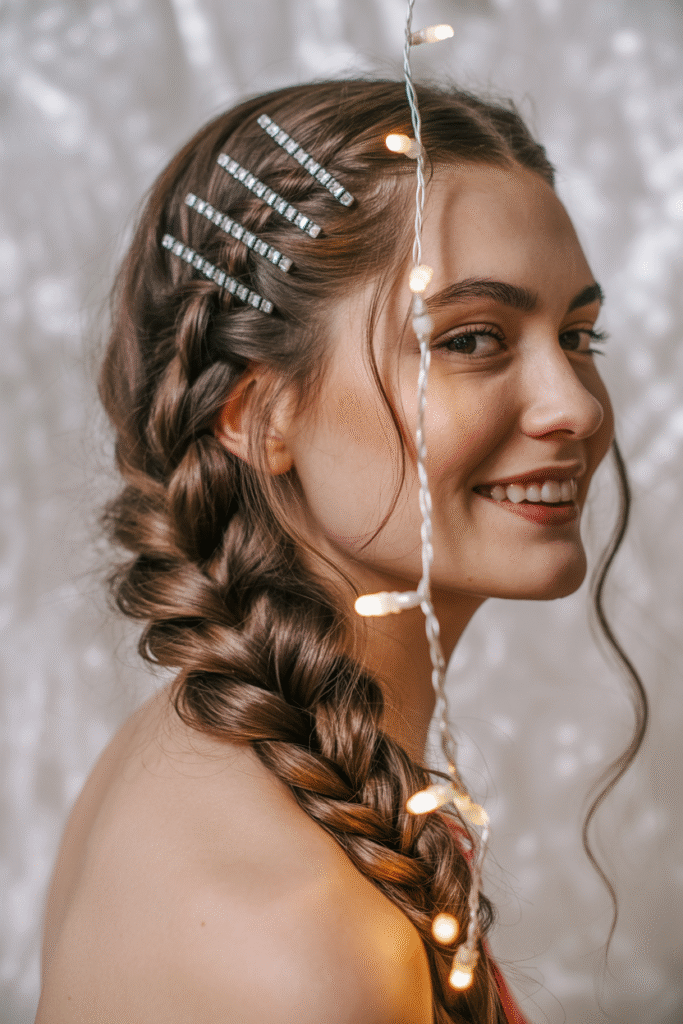
I love a half-up fishtail because it leaves length free but still controls the top. It balances “I tried” and “I woke up like this.”
Why it slays
- Fishtail texture looks intricate without complicated technique.
- Half-up base secures face layers and resists flyaways.
- Pin playground: You can stack gems or clips without crowding.
How I do it
- I take a top horseshoe section and secure it.
- I split it in two, then I move a thin slice from the outer right to left, then from left to right. I repeat.
- I pancake for fullness and slide sparkle pins along the seam.
Style it: I place three pins staggered along the curve—odd numbers always read chic.
5) Side-Swept Waterfall Braid
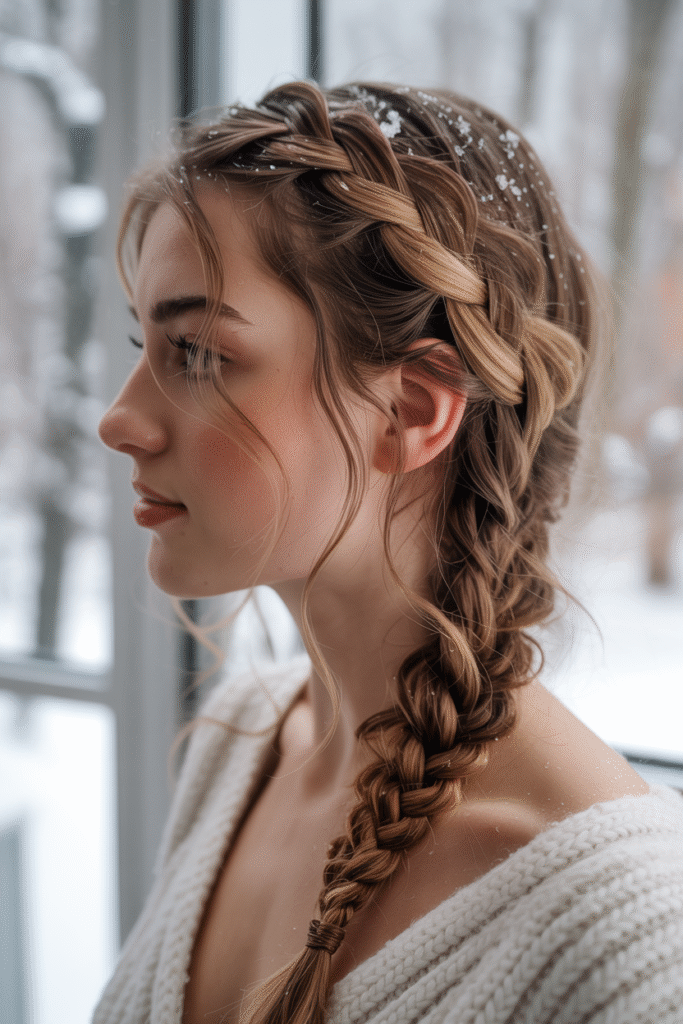
You want movement without heavy hair around your face? A waterfall braid drops strands as it goes and creates waves that look fancy with zero curling iron chaos.
Why it slays
- Soft drape flatters most face shapes.
- Built-in wave guide: The released strands set into gentle bends.
- Camera-friendly line that angles from temple to nape.
How I do it
- I start near the part and braid three strands.
- I drop the bottom strand each cycle and pick up a new one from behind.
- I secure behind the ear and hide the elastic with a hair piece.
Style it: I mist with salt spray before braiding so the dropped strands land with texture.
6) Bubble Braid with Velvet Wraps
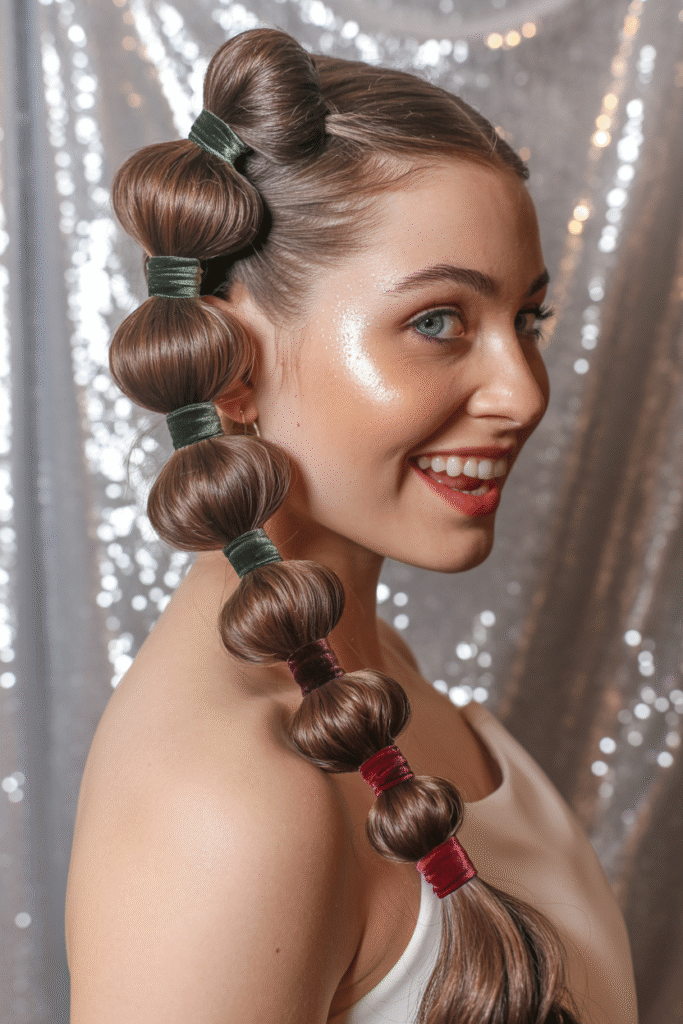
When I feel extra, I go bubble braid. It reads playful, it loves accessories, and it never asks for a complicated technique. Also, kids ask to copy it, which boosts my Aunt Cred.
Why it slays
- Statement silhouette without braiding skill.
- Accessory-ready spacing for ribbons and mini scrunchies.
- Low tension on edges, so your hairline says thank you.
How I do it
- I secure a high pony and add elastics every 2–3 inches.
- I gently pull each section sideways to inflate the bubbles.
- I wrap velvet strips over each elastic for glam.
Style it: I match the velvet to my shoes, because petty details thrill me. IMO, that coordination makes the whole outfit feel intentional.
7) Classic French Braid with a Glossy Finish
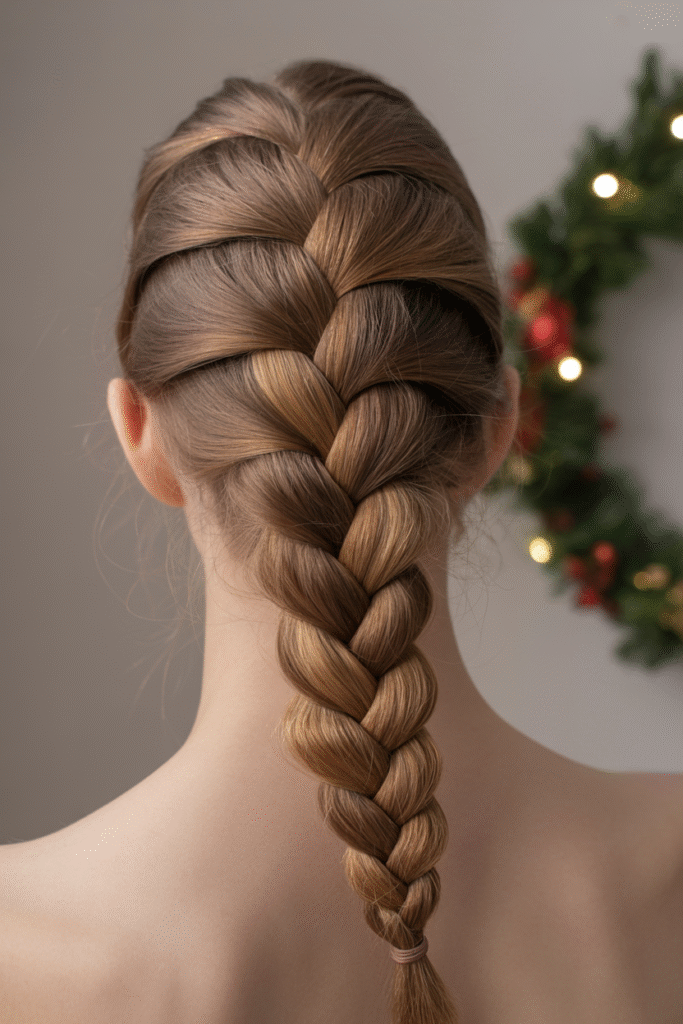
When I need bulletproof, I braid French from hairline to nape and add a bit of gloss oil. The finish says “sleek adult,” not “soccer warm-up,” thanks to shine and tight sectioning.
Why it slays
- Timeless line works with every neckline.
- Secure top handles wind and hugs.
- Easy refresh: I smooth flyaways with a toothbrush and hairspray in the bathroom mirror.
How I do it
- I start at the crown and split three equal sections.
- I cross over the middle and add hair each time, keeping tension even.
- I finish with a simple three-strand to the ends and seal with oil on the tail only.
Style it: I slide a satin bow at the nape for a party-ready finish.
8) Twisted Halo with Hidden Braid Detail
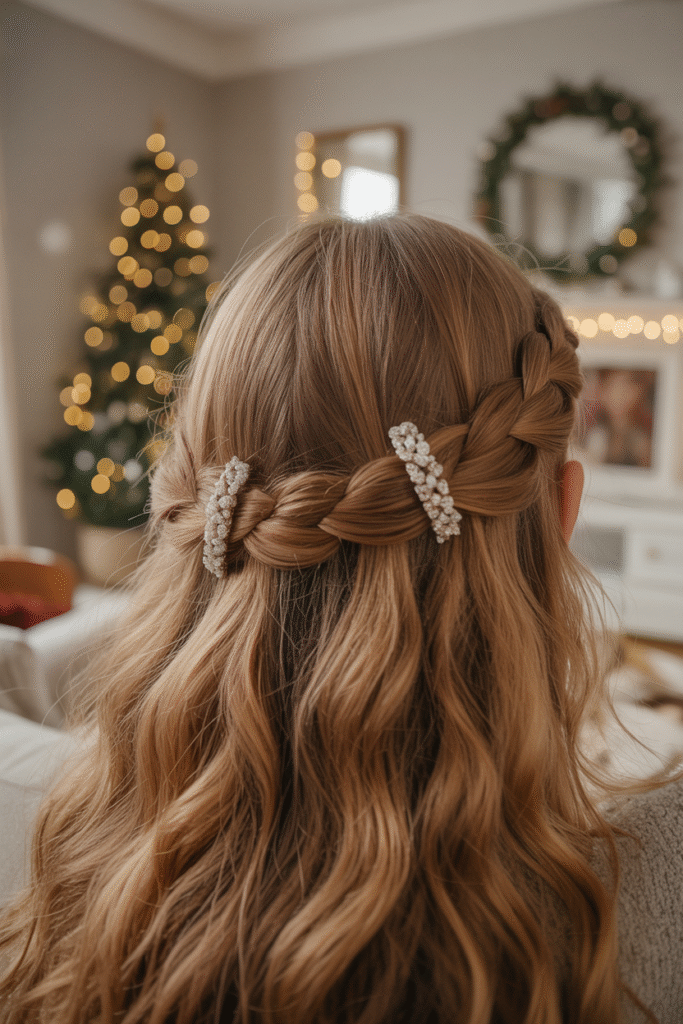
I love a style that reveals a secret up close. I twist two face pieces back, then I hide a micro braid beneath the halo. People spot it later and ask how long I spent on hair. I shrug and claim natural talent. 😉
Why it slays
- Minimalist front with intricate detail up close.
- Comfortable all-day hold with almost no pins.
- Works on short-to-medium hair that refuses elaborate braids.
How I do it
- I twist face pieces back and pin at the crown.
- I take a small section underneath and do a tiny three-strand braid.
- I tuck the braid end under the twists and line the halo with two decorative clips.
Style it: I use barrettes with subtle sparkle to catch candlelight.
9) Pull-Through Braid (The Fullness Hack)
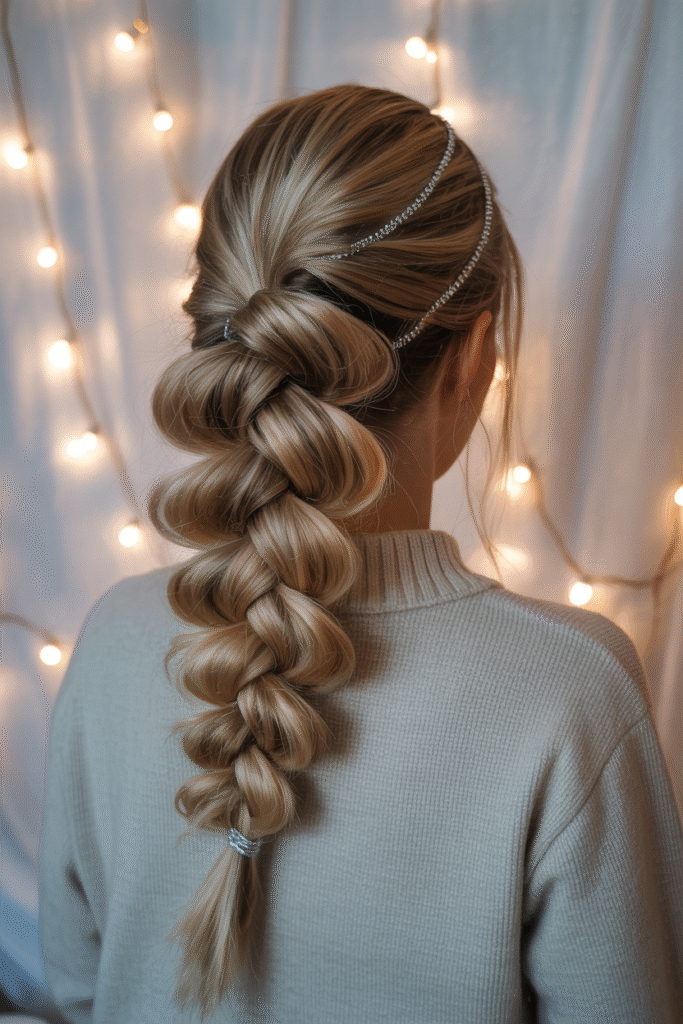
If your hair feels fine or flat, you want the pull-through technique. It fakes volume by stacking ponytails and pulling them through each other. No one needs to know.
Why it slays
- Mega volume without extensions.
- No hand cramping since you work with elastics, not weaving.
- Scarf-safe: The structure resists flattening.
How I do it
- I make two stacked mini ponies at the crown.
- I split the top pony and pull the second pony through the middle.
- I add another pony below, combine, and repeat down the head.
- I pancake each loop to build max fullness.
Style it: I thread a thin metallic cord along the elastics for festive shine.
10) Low Braided Bun with Metal Cuffs
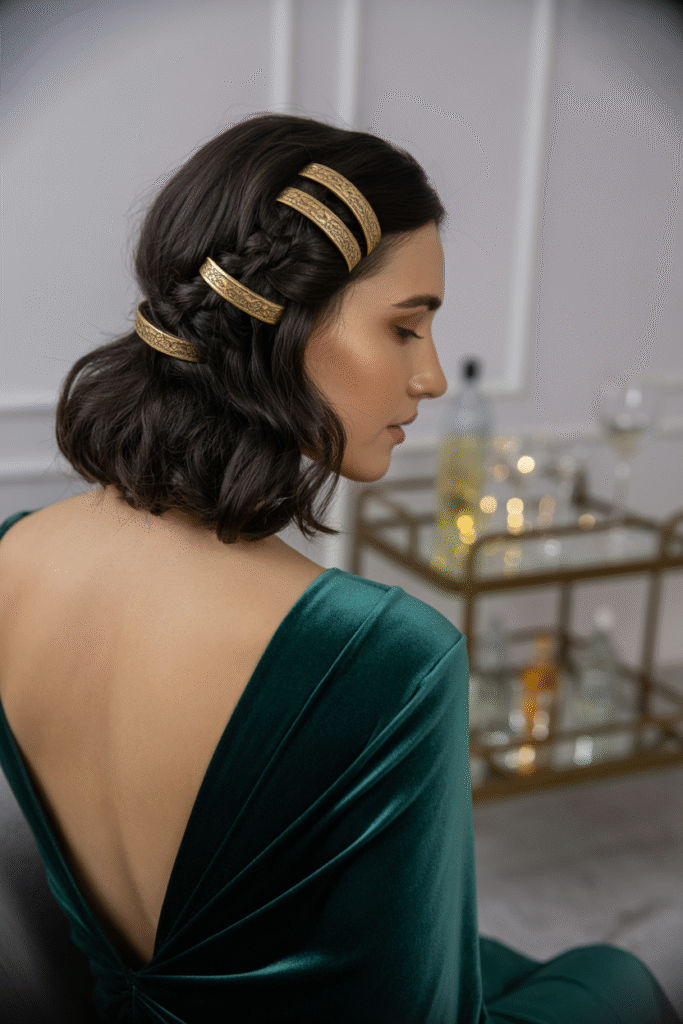
I save this for dressy dinners when I want my neckline to shine. A low braided chignon with metal cuffs looks boutique-blowout fancy without the salon price.
Why it slays
- Neckline spotlight for statement earrings or a high collar.
- Secure base that stays elegant, even at 1 a.m.
- Easy accessorizing: Cuffs slide on and stay aligned.
How I do it
- I create a low pony, braid it, and spiral it into a bun.
- I pin the perimeter, then slide cuffs onto the visible braid sections.
- I smooth edges with gel for a clean nape.
Style it: I match gold cuffs with warm makeup; I swap for silver when I wear cool tones.
11) Double Dutch Pigtails (Grown-Up Edition)
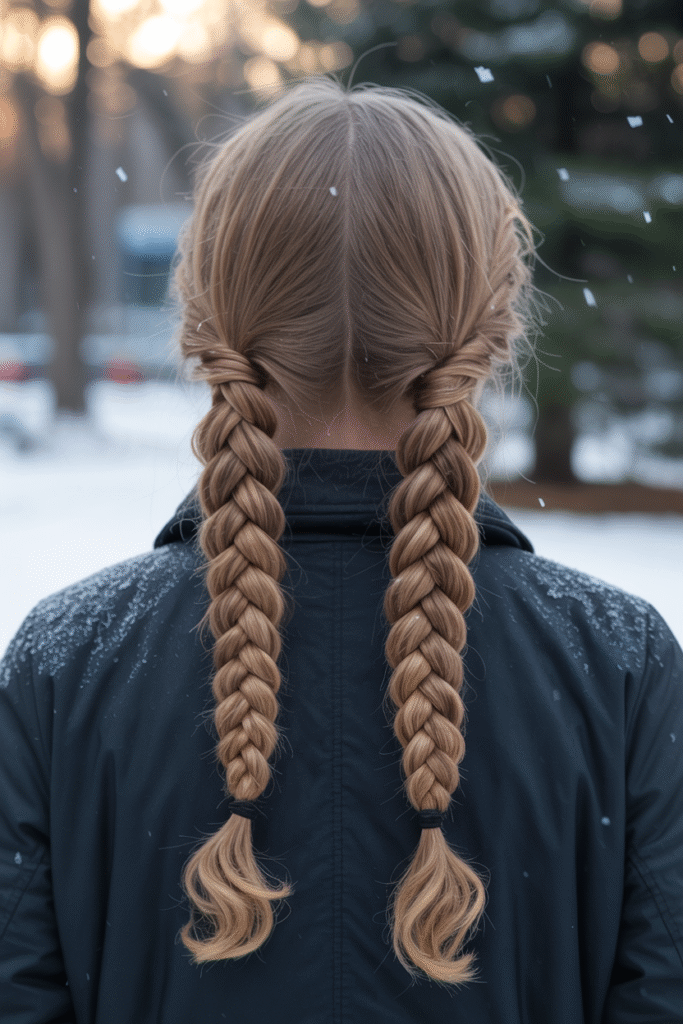
You remember school-day pigtails. Let’s upgrade them. I Dutch braid each side, then I connect both tails into one low braid or leave them as twin ropes for a sporty-chic look.
Why it slays
- High hold with weight balanced across the scalp.
- Playful symmetry that still reads modern.
- Hat-friendly: I tuck the tails into my coat collar when it snows.
How I do it
- I part straight down the middle and clip one side.
- I Dutch braid the first side to the nape, then repeat.
- I join the tails into one braid or keep two depending on the outfit.
Style it: I weave thin ribbon into just one braid for asymmetry that keeps it adult.
Quick Comparison: Which Braid Fits Your Plan?
I choose braids like I choose shoes: by activity and vibe. You can copy my cheat sheet and save time.
Best for long nights: French braid, Double Dutch, Low braided bun
Fastest to build: Rope pony, Bubble braid, Twisted halo
Most accessory-friendly: Ribbon-laced Dutch, Half-up fishtail, Low bun with cuffs
Volume boost heroes: Pull-through braid, Pancaked Dutch, Bubble braid
Hat or scarf weather: French, Double Dutch, Rope pony
Accessory tips that never fail:
- Rule of three: I group three pins instead of one big clip for balance.
- Contrast counts: I choose light accessories on dark hair and deeper tones on light hair for pop.
- Texture mix: I pair matte velvet with shiny hair or metal with matte finishes for dimension.
FAQ: Holiday Braids, Answered Fast
How long do these styles last?
I budget 6–10 hours with light touch-ups. I carry a mini hairspray and a few pins.
Can I braid fine, slippery hair?
Yes. I prime with mousse and dry shampoo, then I pancake to widen the braid.
What if my hair sits at shoulder length?
I choose Twisted halo, Half-up fishtail, or a Low braided bun with tucked ends.
Do braids work with curls or coils?
Absolutely. I layer leave-in, light oil, and a gel for frizz control, then braid while slightly damp. FYI, coils hold shape like champs.
How do I remove accessories without breakage?
I hold the braid firm, slide pins out in the direction they went in, and I cut elastics with a bobby pin edge, not scissors near hair.
Step-By-Step Mini-Guide (Bookmark-worthy)
I keep this sequence on my phone when I travel for the holidays. It covers most braids with predictable results.
- Prime: I spritz dry shampoo at roots; I work mousse through mid-lengths.
- Part: I set my part or center line before I touch any braid.
- Braid: I keep even tension and small, consistent sections.
- Secure: I use clear elastics and stash extras in my clutch.
- Expand: I pancake edges for width and drama.
- Detail: I add pins, ribbon, or cuffs last so I don’t trap flyaways.
- Set: I mist workable hairspray, then a final gloss on ends only.
Key takeaway: Prep + tension + expansion = party-proof braids that look luxe.
Troubleshooting (Because Life Happens)
- Braid slides out: I add texturizing powder to the strands and start again with smaller sections.
- Frizz halo appears in photos: I smooth the top with a toothbrush + hairspray and let it dry before touching.
- Ends stick out: I tuck them under with a U-pin and seal with a micro elastic.
- Scalp line looks sparse: I zigzag my part slightly and lift roots with a comb before braiding.
- Accessory overload: I remove one piece and step back. If I question it, I over-did it. :/
The Only Products I Actually Reach For
I keep my kit short because I like counter space. I rotate brands, but I stick to these categories no matter what label sits on the bottle.
- Light mousse or foam for grip
- Dry shampoo for texture
- Workable hairspray for buildable hold
- Gloss oil/serum for ends
- Texturizing powder for extra oomph
- Clear elastics, U-pins, bobby pins (in hair color)
- Ribbons, pins, cuffs, and a bow scrunchie for finish
Real talk: I skip heavy creams on braid day. They weigh hair down and smudge shine.
Find Your Perfect Holiday Braid
Use this quick picker to match a braid to your hair length, texture, time, and vibe. I coded it simple and fast so you can tap answers and get a customized recommendation on the spot.
Holiday Braid Finder
Quick Safety + Comfort Reminders
- I keep edges comfortable—no style deserves a headache.
- I tuck sharp pins inward and anchor them into the braid lattice, not the scalp.
- I stash two elastics and a mini spray in my bag because backups reduce stress.
Want Photo-Ready Shine Without Slip?
I chase shine on the surface and grip in the braid. I use mousse and dry shampoo before I braid, then I finish with gloss on the ends so the braid reads smooth without loosening.
Shine checklist:
- Prime with texture (mousse/dry shampoo)
- Braid with tension (consistent hands)
- Gloss the tail (never the base)
- Mist and leave it (hands off until fully dry)
Final Word: Choose One Signature Braid (Then Build a Rotation)
You don’t need all eleven to win the holidays. Pick one signature that flatters your face and fits your schedule—maybe the Half-Up Fishtail for cozy dinners or the Low Braided Bun for the big party. Lock that in, then add one backup for when plans change last minute. You’ll walk into every gathering with intentional hair, zero panic, and a casual glow that says, “I planned the important stuff.” Now go claim the good lighting and the first slice of pie. You earned it. 🙂